VIDEO TUTORIAL
Complete Epoxy Resin Countertop Tutorial
Introduction
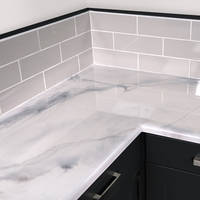
The step-by-step instructions described here, and demonstrated in the accompanying Complete Resin Countertop Tutorial video, cover all the general information needed transform almost any existing surface into a smooth, hygienic and highly attractive resin worktop/countertop using GlassCast 3 epoxy coating resin.
GlassCast Countertop Kit Users
If you're using one of our bundled GlassCast Countertop Kits then you should also watch the short effect video tutorial for your chosen kit in order to see the exact method used to perfect the look of that particular kit. Those videos can be seen on the individual product pages for each kit.
GlassCast Countertop Kits also include a downloadable 'Colour Card' which tells you exactly how much resin and pigment to use at each stage of the process for different sized countertops so make sure you download and follow the Colour Card throughout the process.
Not Using a GlassCast Countertop Kit?
You can also follow these instructions if you're not using a bundled GlassCast Countertop Kit but instead are using your own combination of colours and effects to create a totally unique countertop kit.
In this case you won't have a specific effect tutorial to watch and follow but it would be well worth watching the short videos that accompany our bundled Countertop Kits to familiarise yourself with the methods used to create different effects. You can then use these methods with your own combination of colours.
Although you won't have a 'Colour Card' to follow, this guide will give you the general measurements for resin, hardener and pigments at each stage of the process.
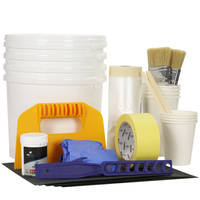
What You Will Need
Resin, Pigments and Effects
GlassCast Countertop Kits contain the required resin, hardener and pigments to achieve different appearances. If you're not using a bundled kit then you will need:
- GlassCast 3 Epoxy Coating Resin (includes hardener)
- Your choice of epoxy colour pigments
- Your choice of metallic effect powder pigments
Ancillaries
- A hair dryer (ideally one you're not too worried about!)
- Digital scales
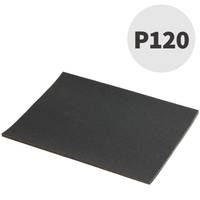
- 120 grit abrasive paper
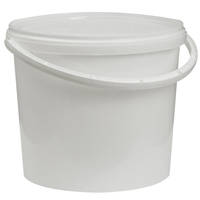
- At least two clean mixing buckets/pots large enough to hold all of the resin you'll be mixing in one go (see 'planning the job' below for quantities)
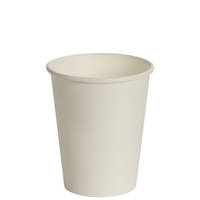
- Several smaller mixing cups
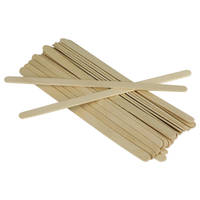
- Large and small mixing sticks
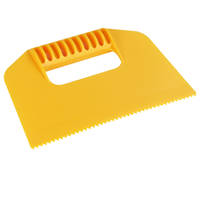
- Resin spreader
- 2 disposable paint brushes
- 50mm (2”) masking tape
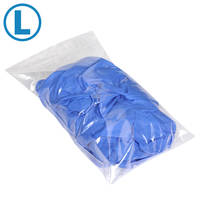
- Nitrile gloves, glasses/goggles and a vapour mask (in case of insufficient ventilation)
Finishing or Polishing (Optional)
If you find yourself with any marks or blemishes to correct, you may also require:
- Additional abrasive papers (240, 400, 800, 1200)
- Polishing compound
- Polishing rag (such a microfibre cloth)
Planning the Job
Working out the Surface Area
In order to know which sized countertop kit(s) or how much resin to buy, you first need to work out the surface area you will be covering.
We want to know the area of your counters in square metres (m²) which is simply the length (in metres) multiplied by the depth (in metres).
For example, a counter measuring 260cm (2.6m) x 56cm (0.56m) = 2.6 x 0.56 = 1.456m²
- If you have multiple surfaces, work out the area of each one separately and then add them together
- If your surfaces are 'L' or 'U' shaped, divide them up into imaginary rectangles, work out the area of each rectangle, and then add the areas together.
Ordering the Right Sized Kit or Resin Pack
Once you have a 'grand total' for the surface area of your counters you can choose the best sized countertop kit or resin pack(s) for your project.
Ordering as Countertop Kits
Simply order the combination of kits sufficient for the area you calculated.
For example: If you calculated 2m² or less then order the '2sqm' kit. If you calculated 4m² then order two of the '2sqm' kits. For 8m², order a '6sqm' and a '2sqm' kit.
Ordering Separately as Resin and Pigments
If you're ordering resin and pigments separately, the table below shows you how much resin and typical quantities for pigments you'll need to cover different areas:
| 1m² | 2m² | 3m² | 4m² | 5m² | 6m² | |
|---|---|---|---|---|---|---|
| GlassCast® 3 | 2.5kg | 5kg | 7.5kg | 10kg | 12.5kg | 15kg |
| Primer Pigments | 50g | 100g | 150g | 200g | 250g | 300g |
| Strong Colours* | 100g | 160g | 240g | 320g | 400g | 480g |
| Tints & Accents** | 1g | 2g | 3g | 4g | 5g | 6g |
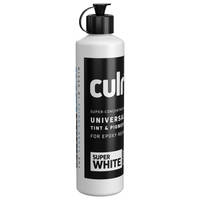
*Strong Colours –CULR pigments or SHIMR powders. These quantities would produce strong, vibrant colours that would be the main colour(s) of the countertop. It's possible that you may be ok to use a
little less when working with darker shades and the higher ration with lighter colour CULR pigments, in particular the Super White and Polished Gold, Copper and Silver.
**Tints & Accents –CULR pigments or SHIMR powders. These quantities would be required to produce more subtle colours or just make up small mixes for veins or details. This part can be measured by eye.
Dividing up the Work
Like all epoxies, GlassCast 3 has a finite pot-life and working time as soon as the hardener is added to the resin. Because of this, we suggest only ever trying to coat a maximum of 2m² metres at a time (a typical worktop about 4m long). Doing so will ensure that you have plenty of time to get the resin pigmented, mixed and applied to your surfaces without the risk of it starting to cure in the pots.
Larger projects such as large kitchens, bars or shop counters will usually be made up of multiple counters and so in this situation it is recommended to divide up the work so that you're only covering 2m² at a time. If you can't avoid a larger pour, a single 4m² island for example, then split the work between two people, mixing and pouring 2m² each.
Important Safety Information
GlassCast 3 is a chemical product. Before storage or use you must download and read the accompanying safety datasheet.
A summary of the most important information is as follows:
- Always wear nitrile gloves when handling the resin or hardener.
- Never touch uncured or partially cured resin with your bare skin.
- Wear suitable eye protection when handling the resin or hardener.
- Although GlassCast 3 is solvent free and has almost no odour you should still work in a well-ventilated area or wear a vapour mask.
How to Correctly Mix and Pigment Epoxy Resin
Whenever you prepare a mix of GlassCast resin, it is essential to ensure that you follow the correct procedure for measuring and mixing the resin. Failure to do so can result in improperly cured resin, or sticky patches and streaks on the surface.
Resin to Hardener Mix Ratio
GlassCast 3 uses a 2:1 mix ratio, by weight. This means you would mix 100g of resin with 50g of hardener. It's important to be as accurate as possible, ideally to within 1 or 2 grams; this will ensure the best possible performance from the cured resin.
Different resins use different mix ratios, never use the mix ratio for another resin and never attempt to add more or less hardener to speed up or slow down the reaction; that's not how epoxies work.
If you are using a GlassCast Countertop Kit then all resin and hardener measurements are done for you; simply weigh out the amounts listed on your kit's 'Colour Card' at each stage of the process.
When to Add the Pigment
It's fine to add liquid CULR pigments or metallic effect SHIMR powders into the resin before or after you add the hardener. However, because the resin starts curing as soon as you add the hardener, if you want to take your time adding different pigments or effects to the resin, it's better to do this before you add the hardener.
How to Mix
GlassCast 3 should be always be mixed by hand. We strongly advise against using drill attachment power mixers (sheer mixers/jiffy mixers) as these tend to heavily aerate the resin, making it harder for the resin to degas itself.
Mix using a large, clean mixing stick using a thorough, methodical action. Ensure that you regularly scrape the sides, bottom and corners of the mixing bucket, as well as the mixing stick, to ensure the resin and hardener are thoroughly combined. Having mixed them together for around 3 mins (for a any batch size up to about 4kg) you should then transfer to a new pot and mix again. See below.
Double Potting
Whenever you mix GlassCast 3 epoxy with its hardener, we always recommend using the 'double potting' method. Double potting is the process of mixing resin and hardener thoroughly in a first pot or bucket before transferring the mix into a second clean pot or bucket and mixing again.
The idea of this process is to ensure that any unmixed resin from the bottom or sides of the pot do not make it out onto your job. This is particularly important when doing the 'main pour' of resin for your countertop as any unmixed resin will not cure and will leave sticky patches or streaks on your otherwise perfect countertop.
Working Environment
Ambient Temperature, Pot-Life and Cure Time
Epoxy resins are highly sensitive to ambient temperature.
For best results, we recommend working in a room temperature of 20°C. GlassCast 3 can be used in temperatures from 15 to 25°C but higher temperatures will reduce the pot-life of the resin significantly; see below.
| Ambient Temperature | 15°C | 20°C | 25°C |
|---|---|---|---|
| Pot Life | 45 mins | 30 mins | 22 mins |
| Initial Cure | 36 hrs | 24 hrs | 18 hrs |
Airborne Dust and Contamination
Whilst the resin is still in the early stages of its cure, it is important to keep airborne dust and contamination to a minimum. Before you begin you should ensure that the area you’re working in is as free as possible from dust and dirt.
Although you need good ventilation whilst you’re working, in order to minimise airborne dust and contamination, it’s best minimise air movement or disturbance in the room as soon as you’re done working.
Step-by-Step Guide
Overview of the Process
- Prepare the work area and key the worktop with abrasive paper
- Apply a primer coat of GlassCast 3 resin, hardener, and a heavy pigment
- Once cured, key the primer coat with abrasive paper
- Use masking tape to make a resin barrier along the front edge
- Mix up the main batch of resin and then split off into different colours or shades
- Apply the resin to the countertops within 30 mins of first mixing it
- Spend up to another 30 mins blending a perfecting the appearance
- Wait 1 hr then remove the barrier tape to create the rolled front edge
2. Prepare your Work Surfaces
Traditional Laminate Worktops
If you’re pouring onto an existing laminate worktop, you should key the entire surface of the worktop using a coarse 120 grit abrasive paper. This will ensure that the GlassCast 3 resin can bond properly to it.
Spend plenty of time doing this; laminate can be tough and you need to ensure that the surface is properly scuffed all over, including into the corners and all over the front edge. If you have a power sander then you can certainly use it for this job.
Wooden Worktops, MDF or Plywood
Traditional wooden worktops are likely to have been treated with oils, varnishes or other coatings and should be thoroughly sanded back using a coarse 120 grit abrasive paper.
Virgin wood like MDF or plywood does not need to be keyed prior to priming.
3. Protect the Surrounding Area
Epoxy resin cures very hard and sticks to just about everything. Before applying any resin, be sure to properly mask off and protect the surrounding area:
- Remove or protect your cupboard doors using plastic sheeting or masking film
- Protect adjacent walls using plastic sheeting or masking film
- Protect the floor all around the countertops with plastic sheeting/old carpet tiles etc.
4. Mask-Off Your Tiles or Splashback
You will mask off once for the primer coat and then remove and replace this masking tape for the main pour. In both cases, you will be removing the masking tape before the resin cures. This process will ensure the tape is easy to remove and will leave a crisp line where the resin surface meets the back wall.
Existing silicone on a worktop does not need to be removed when preparing a worktop. Old silicone like that does not cause any issues with the resin. The only time we would be cautious is if it is fresh silicone. If making new worktops, do not use silicone until the GlassCast project is complete, at which time you can seal any gap between the tiles and resin surface, much like you would with a normal worktop.
- Where the resin countertop will meet your walls, tiles or splashback, carefully position a band of masking tape so that it exactly meets the worktop.
- Position another band of masking tape on the underside of the front edge of the counter. When you do this, position it a few millimetres back from the edge; positioning it too close to the front can cause a resin trap which will collect excess resin and form a lip.
5. Mix and Apply the Primer Coat
The purpose of the primer coat is to block-out any underlying colour or patterns on your existing countertop and provide a smooth, bondable foundation for the main pour. If you’re applying the resin onto wooden worktops, MDF or plywood then the primer coat will soak into these materials, making them stronger and non-porous.
In most cases the primer coat will be a single solid colour but there are some occasions where a multi-tone primer coat is used.
If you’re using a Countertop Kit, mix the primer coat following the resin, hardener and pigment quantities listed on your kit’s colour card, otherwise use the following guide when mixing the primer coat:
- Primer-coat should be applied at a coverage of 500g/m²
- Primer-coat pigment should typically be added at 10% by weight
- Resin-to-hardener ratio must be 2:1 by weight
| Surface Area | Total Resin Mix | Resin | Hardener | Pigment |
|---|---|---|---|---|
| 0.5m² | 250g | 167g | 83g | 25g |
| 1m² | 500g | 333g | 167g | 50g |
| 1.5m² | 750g | 500g | 250g | 75g |
| 2m² | 1000g | 667g | 333g | 100g |
- Measure, pigment and mix primer-coat using the double-potting process described in section 5.
- Pour the primer-coat onto your prepared surfaces.
- Spread the primer-coat out evenly using a brush; aim to leave it as smooth, even, and consistent as possible.
- Make sure you apply primer down onto any visible edges such as the front rolled edge.
- You can immediately remove the masking tape from the back edge where the resin meets the wall, splashback or tiles.
- Over the next hour, if any drips form on the underside of the front edge, wipe them away with a brush.
- Once drips are no longer forming (around 1-2 hours), remove the tape from the underside of the front edge.
6. Allow to Cure then Key the Primer Coat
Leave the resin to cure until it feels hard and dry; at a steady 20°C that will be 24hrs. There isn’t a maximum amount of time you can wait at this stage so if you’re in any doubt, wait longer. Always used a gloved finger when checking the cure state of the resin.
Once the resin is hard and dry, key the surface thoroughly with 120 grit abrasive paper by hand. We don’t recommend using a power sander for this stage. Make sure you don’t miss anywhere, including into the back corners and all the way over the rolled front edge.
Once you’re done, thoroughly wipe away all the dust with a clean, dry cloth.
7. Replace the Masking Tape
Replace the masking tape you removed from the back edge and underneath the front edge, repeating the same positioning and technique as before.
8. Create a Resin Barrier for the Front Edge
Use masking tape to create a resin barrier along the front edge of the worktop. Stick the tape to the front edge but leave it sticking up vertically rather than allowing it to follow the radius of the front edge; this will create a small ‘well’ which will hold extra resin for the front edge. The top edge of the masking tape should be at least 5mm higher than the surface of your worktop.
Double-up the masking tape so that it’s two layers thick; this makes it more sturdy when holding the resin back.
9. Pigment and Mix the Resin for the Main Pour
General Advice
- To give yourself more time, it’s a good idea to add the pigments to your main mix before you add the hardener.
- When you add the hardener to the resin, you will have 30 mins to get the bulk of the resin out of the pots and onto your worktops. Make a note of the time or set a timer on your phone as a reminder!
- Follow the correct mixing procedure from section 5; it’s even more important to make sure you MIX THOROUGHLY and DOUBLE POT the resin for this main pour.
Pigmenting the Resin When Using a Countertop Kit
For most Countertop Kits you will start by creating a ‘base mix’ and then you’ll divide off some of this base mix to create the various other shades and accents for the effect. Follow the instructions and measurements shown on your Countertop Kit’s Colour Card.Pigmenting the Resin Using Your Own Colour Combinations
If you’re using your own combination of colours and effects then it’s certainly best to experiment first on a sample board to perfect your colour combinations and techniques before you do the main pour. The table below will give you some guidelines for resin quantities and pigment ratios:| Surface Area | Total Resin Mix | Resin | Hardener | CULR / SHIMR (Strong Colour) |
SULR / SHIMR (Tint / Shade) |
|---|---|---|---|---|---|
| 0.5m² | 1kg | 667g | 333g | 20g | 0.5g |
| 1m² | 2kg | 1333g | 666g | 40g | 1g |
| 1.5m² | 3kg | 2000g | 1000g | 60g | 1.5g |
| 2m² | 4kg | 2666g | 1333g | 80g | 2g |
10. Applying and Blending the Resin for the Main Pour
Countertop Kit Users
Apply and blend the colours and effects according to your Countertop Kit’s Colour Card and video instructions.
General Advice
- Once you have added hardener to your resin, you have 30 mins to get the bulk of the resin out of the pots and onto your work surface.
- After doing this, if any of your pots are more than about ¼ full you should pour a small amount into a new pot or surface (you may want to add some more in later) and then put the larger pots outside, just in case they start to overheat.
- Always use a hair dryer on a low heat setting or no heat at all to avoid overheating the resin.
- Make sure you finish working on the resin within 1 hour of when the hardener was first added.
Using You Own Colour Combinations
There is no right or wrong way to apply and blend colours and effects when you are creating your own unique look. Here are some techniques which we use in our different Countertop Kits:
Hair Dryer
A hair dryer is the perfect way to blend colours and effects in an organic way. You can use a strong blowing action to create larger areas with more gentle blending or you can use a lighter action to gently steer and control thin veins and accents.
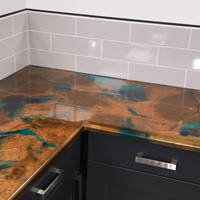
Layering
Layering different colours can be a very effective way to create more subtle blends between colours and create a sense of ‘depth’ in the counter. Layering is most effective when the ‘base mix’ is slightly translucent, allowing colours underneath to show through the layer on top. See our Carrara White Marble effect tutorial for a good example of this technique.
Brushing
Alongside a hair dryer, a paint brush can be another useful tool for blending colours however we normally recommend only using a paint brush to blend lower layers or to blend colours before further blending with a hair dryer in order to avoid any obvious ‘brush marks’ in the end result.
Veining (Drizzling)
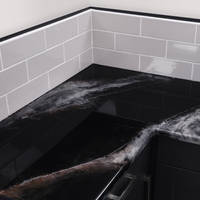
Very many countertop effects involve drizzling thin lines of tints or accent colours in slightly randomised lines across the countertop. These lines simulate the natural veins and fissures which are so characteristic of natural stone materials such as granite, marble, and quartz. These veins are usually created by creating wider, softer bands of colour first and then drizzling thin lines of more contrasting colour over the top by pouring a thin trickle from a cup.
When applying these veins it’s best to start drizzling ‘off the counter’ and then bring the drizzle across and off the other side. Doing so avoids having heavier ‘splodges’ at the edges of the counter and gives more continuity.
Use a hair dryer to gently disturb the veins after pouring them to creak up the lines and produce a more realistic appearance.
11. Removing the Barrier for the Rolled Edge
Before removing the barrier tape from the front edge, you should wait around 1 – 1 ½ hrs for the resin to ‘gel’ slightly. This will ensure the resin is still fluid enough to flow over the edge without being so thin that too much of it pours off. You can test the behaviour of the resin by nudging the barrier tape before you remove it.
Starting at one end, remove the barrier tape, allowing the resin to creep over the front edge. Don’t worry if it flows very slowly, providing you haven’t left it too long, it will always make its way down eventually.
If the resin hasn’t completely coated the front edge of the counter within 10 minutes of the tape being removed, you can coax some of it down using a paint brush. Don’t worry about this causing streaks or brush marks, they will usually blend in perfectly once the resin starts to settle out.
Use a mixing stick or spreader to wipe off excess resin and drips as they form on the underside of front edge. Continue to do this for the next half an hour or so.
Once you’re happy that the resin is no longer flowing, remove the masking tape from the underside of the front edge and also along the back edge where the resin meets your walls/tiles/splashback.
12. Leave to Reach Initial Cure
Leave the resin to reach its initial cure. This will take around 24hrs at 20°C.
It’s important to maintain a steady temperature in the room during this time. Colder temperatures will considerably slow down the cure and can even cause condensation to form on the resin, spoiling its glass-like appearance.
Although the resin will continue to harden for several more days, after 24hrs it should be sufficiently cured to continue to the final tidy-up.
13. Removing Drips and Finishing-off
Before starting on the final tidy-up, test a small area of the resin to check for its state of cure. Although not fully cured, the resin should feel hard and dry. If the resin still feels a little soft, consider increasing the room temperature and wait a bit longer.
Use some 120 grit abrasive paper, wrapped around a block, to rub away any drips on the underside of the front lip. You might find it helpful to put some making tape on your doors or handles when you do this.
If you find that the front edge has a bit of a ‘lip’ at the bottom, this can be sanded smooth using increasingly fine abrasive papers, typically 400, 800, 1200, and then finished with a polishing compound such as Pai Cristal NW1.
14. Allowing the Counter to Fully Cure
It’s important to leave the resin as long as possible before subjecting the counter/worktop to normal use. It will continue to harden for at least 5 days and during this time it will scratch and mark more easily. It’s particularly important to not place heavy objects on the counter during this time.
DISCUSSION (0)
Please share any questions or comments you may have about this video tutorial.
LEAVE A COMMENT OR QUESTION
Downloads (1)
| Resin Countertop Handbook |
USED IN THIS PROJECT
Want to buy the same materials and equipment used in this tutorial? We've got you!
Please find below a list of all the materials and equipment used in this project, all available to buy right here on the GlassCast website. Shown alongside each product is the approximate quantity used in the tutorial video, to the nearest full pack.
COUNTERTOP KITS

ANCILLARIES
DISCUSSION (0)
Please share any questions or comments you may have about this video tutorial.