VIDEO TUTORIAL
How to Sand and Polish Epoxy to a Mirror Finish
Step-by-step video tutorial covering the complete process of how to flat and polish epoxy resin up to a high gloss/mirror finish, including tools, abrasive selection, process and professional tips.
If you are struggling to achieve a perfect, high gloss finish on your river table, countertop, casting or jewellery piece, this complete guide will have you polishing epoxy resin like a pro in no time.
What You Will Need
Materials
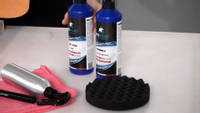
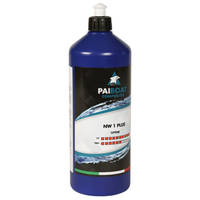
- NW1 Fast Cutting Compound
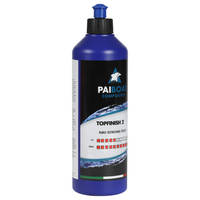
- TOPFINISH 2 Ultra Gloss Polishing Compound - 500g
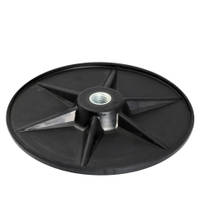
- 125mm Backing Plate for 150mm Polishing Pads
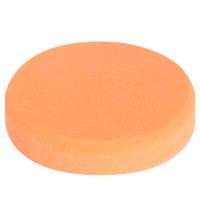
- Medium/Hard (Orange) Polishing Pad
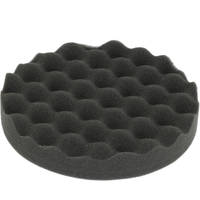
- Soft Wavy Black Polishing Pad
Flatting
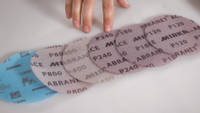
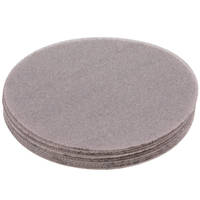
- P120 Mirka Abranet Ace Abrasive Discs 125mm - Pack of 10
- P180 Mirka Abranet Ace Abrasive Discs 125mm - Pack of 10
- P240 Mirka Abranet Ace Abrasive Discs 125mm - Pack of 10
- P400 Mirka Abranet Ace Abrasive Discs 125mm - Pack of 10
- P800 Mirka Abranet Ace Abrasive Discs 125mm - Pack of 10
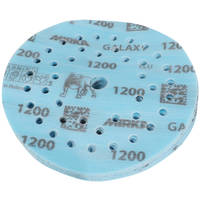
- P1200 Mirka Galaxy Abrasive Discs 125mm - Pack of 10
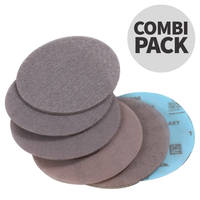
- P120-1200 Mirka Abrasive Discs Combination Pack 125mm - Pack of 12

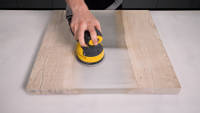
Orbital Sanders
Orbital sanders can speed up the sanding process considerably compared to sanding by hand. The machines come in a variety of types, corded and cordless and also with dust extraction options. Most orbital sanders are available in 125mm and 150mm disc sizes and as such discs are readily available.
Sanding Discs
To go with the orbital sander, you will need sanding discs to do the actual abrasive work. Mirka is one of the industry leading manufacturers of sanding products and has an extensive range of sanding discs available in a variety of grits and formats. Generally they are all attached using a 'hook and loop' type fastening directly to the orbital sanders pad.
The discs in this video include the industry gold-standard 'Abranet ACE' mesh sanding pads and Galaxy finishing pads, which do not clog and allow sanding dust to be vacuumed up through the pad itself, making for almost dust-free sanding operations (when connected to a suitable dust extractor).
Polishing Equipment
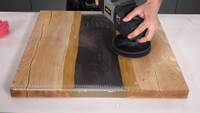
Machine polishing is the quickest way to take the sanded, smooth flat surface to a high gloss. There are a large variety of polishing machines on the market but generally a machine which can take the pad of choice and has a decent variable speed range will work fine for most cases. A backing plate is used to hold the pads to the machine and in this case is a 125mm backing plate designed for use with 150mm discs. The slight undersize of the backing plate ensures that when using the machine on a curve or an edge, the plate does not accidentally hit the resin surface potentially causing more scratches.
Pads themselves come in a variety of sizes and grades of firmness. For this application, the 150mm pads are ideal. For coarser cutting and polishing, a Medium to firm pad is ideal and is what is used for application of the NW1 Fast Cutting compound. For fine finishing work, the Soft Wavy Black Finishing pad is ideal and is used with the TopFinish 2 Ultra Gloss Polishing Compound for the ultimate in gloss finish.
The NW1 Fast Cutting Compound is a modern advanced diminishing polish designed to work from 1200 grit upwards. What this means is the NW1 starts off coarse and the more it is worked, the finer the abrasive particles within it become and hence the gloss develops the more the polish is worked. The TopFinish 2 Ultra Gloss Polishing compound is a very fine finishing polish and is ideal where that extra bit of gloss is needed over and above the already high gloss finish provided by the NW1.
Step-by-Step Guide
1. Basic Technique
The single most important aspect with sanding and polishing is to be consistent and systematic in the chosen approach. Without the systematic and consistent method, it is easy to miss steps and undo all the hard work. Often it is only later in the sanding and polishing process that the shortfalls show through so using a good method from the start will save time later on.
The technique is pretty much identical regardless of the grit used and should remain consistent throughout. The only real variable is the starting grit used which is determined by how rough the surface of the resin is. Rough surfaces or freshly machined surfaces will need to start very coarse at a 120 grit level to remove the machining marks, however minor scratches or surface defects will only need a starting grit of 800 grit.
The main principle is ensuring enough material is sanded off at each stage to remove the scratches from the previous grit. This is achieved by ensuring enough passes are done at each grit level. A single pass consists of sanding from left to right with an overlap and working down the length of the part AND then sanding vertically top to bottom, with the same overlap. Then repeat until the necessary number of passes are done. It is essential to sand over both the resin and the wood so a dip is not created as the sanding progresses. Timewise it will take approximately 10 minutes to do the passes per grit.
Up to 800 grit, use a marker pen between each pass to put some random marks on the resin. As the sanding progresses, the marks will sand off and show the pass is removing enough material. It helps ensure the sanding passes are consistent and methodical.
Regularly check the discs for clogging and remove and unclog the discs as needed. A sure tell tale that the disc is clogged is circular scratches forming on the resin which look like pigtails as the sander is moved. This is done by removing the disc and flexing it between fingers to remove the resin dust. Eventually the disc will need to be replaced as it becomes more difficult to unclog.
Regularly clean the resin surface and check progress to see that the scratches are being removed. If necessary do some additional passes before moving onto the next grit.

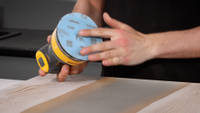
2. Coarser Grit Sanding
For this stage we are using the coarser grits. Initially the 120 grit paper is used to remove the marks from the router. A minimum of 5 passes are needed but depending how rough the finish is, more may be necessary to remove the router marks leaving a smooth finish.
Once the router marks are removed, the 180 grit paper is used. it is important to clean the surface between passes and on changing grits, both to see progress and to ensure the surface is not further scratched from larger grit particles.
With a marker pen, draw a random pattern over the resin surface. The purpose is that with each complete pass, the pen marks will be removed. If the pen marks remain, slow down the sander and/or press down a little firmer to ensure there is enough cutting being done with each pass.
Progress through the grits from 120 to 180, 240, 400 and then 800 grit. Remember to keep the passes consistent to ensure good results. At the 400 grit level, complete 7 passes. This is because 320 grit is being missed out - however experience shows that 7 passes with a 400 grit paper will yield good results saving both time and additional pad cost. When moving to the 800 grit, again 7 passes are used due to the step in the grit levels
At this stage, thoroughly inspect the resin surface to ensure that the scratches from the previous grits have been removed. Go back and sand further before moving onto the finest grade.
3. Fine Grit Sanding
For the final stage of sanding before polishing, the Mirka Galaxy 1200 grit disc is used. Galaxy is Mirka's latest abrasive technology. The unique ceramic grain is self-sharpening, clog resistant and long lasting. In our experience, we have found fine grit Galaxy pads to perform as well as Mirka's industry-leading (but considerably more expensive) Abralon finishing pads, making them equal to the best finishing pads available.
At this stage, to help prevent clogging, wet sanding is the process used. What this means is at the start and between each pass, a mist of water is sprayed over the resin surface. At this level, due to the very fine cutting of the paper, marking the surface with a marker pen is not needed and with the water it may mix and stain the wood. At this final stage, 4 passes are sufficient to achieve the best results.
As a final step before polishing, it is worth sealing the bare wood surface to prevent the wood being stained by the polishing compound, In this case, a couple of layers of Danish Oil are used to seal the wood although other wood sealers can work too.
4. Polishing to a High Gloss Finish
The main polish used for getting a high gloss is the NW1 Fast Cutting Compound. The NW1 is perfectly capable of taking a 1200 grit finish to a good level of gloss. For most applications, the NW1 is as far as you need to go. The TopFinish 2 can be further used to take the gloss level to an almost mirror like finish.
The NW1 is applied using the orange medium/firm polishing pad. Affix the pad to the polishing machine. Apply a few blobs of the polish to the surface of the resin and then, before switching on the polisher, spread the polish evenly over the surface. Switching on the polish, initially use a relatively slow speed and a medium amount of pressure as the pad is worked evenly over the surface overlapping the passes in a similar way to the sanding. Only the resin itself needs to be worked.
The NW1 is a diminishing abrasive so gets finer as it is worked. Occasionally check to see if the resin is warming up. It is ok for the resin to feel slightly warm, but if it feels hot, allow the pad and resin to cool fully before continuing. Once the polish has been worked down to almost nothing, repeat with some more NW1 and a fresh pass. It is important to ensure the NW1 is fully diminished and almost invisible before applying more as otherwise the best gloss level will not be achieved. Before moving on, wipe off any excess polish from the surface
For an even higher gloss finish, the TopFinish 2 can be used on the resin. For this stage, the machine will require the Black Soft Wavy pad. Ensure the surface of the resin is cleaned of all the NW1 residue before applying several blobs of the TopFinish 2 and spreading in a similar way as before. Initially start at a medium speed and medium pressure working the polish into the surface for a couple of passes before increasing the speed to buff it off. Repeat a second application of the TopFinish 2 then polish and buff that layer off. Finally clean any residue off the surface with a microfibre to reveal the very high gloss finish.
DISCUSSION (3)
Please share any questions or comments you may have about this video tutorial.
They will need a clean if they become excessively contaminated with polish residue and/or they pick up dirt. The polishing pads can be cleaned in warm soapy water, rinsed then allowed to dry naturally.
To use a varnish or similar coating product, thoroughly clean the surface of the resin to remove any remaining polish residue. You may also need to sand/key the surface of the resin depending on the varnish manufacturers instructions.
This sort of product is designed to soak into a wood so it wouldn't coat the resin at all and would wipe off the surface. It would be ideal for the wooden area of a river table but wouldn't have any effect on the resin.
It is possible for the polishing dust to get ingrained in the wood, so a solution that works well if it can't be masked off, is to use Danish Oil or similar wood finishing product on the wood before polishing, Then when you polish the wood, any polish dust and debris tends to wipe off easily from the treated wood.
The Polishing compound is not inherently food safe but it does not form a permanent part of the surface so as long as you give the finished product a clean before use, then no traces of the compound should remain.
We can ship to the USA no problem, just add the items to the basket and the Shipping calculator will offer available shipping options.
LEAVE A COMMENT OR QUESTION
USED IN THIS PROJECT
Want to buy the same materials and equipment used in this tutorial? We've got you!
Please find below a list of all the materials and equipment used in this project, all available to buy right here on the GlassCast website. Shown alongside each product is the approximate quantity used in the tutorial video, to the nearest full pack.
POLISHING
FLATTING
DISCUSSION (3)
Please share any questions or comments you may have about this video tutorial.
They will need a clean if they become excessively contaminated with polish residue and/or they pick up dirt. The polishing pads can be cleaned in warm soapy water, rinsed then allowed to dry naturally.
To use a varnish or similar coating product, thoroughly clean the surface of the resin to remove any remaining polish residue. You may also need to sand/key the surface of the resin depending on the varnish manufacturers instructions.
This sort of product is designed to soak into a wood so it wouldn't coat the resin at all and would wipe off the surface. It would be ideal for the wooden area of a river table but wouldn't have any effect on the resin.
It is possible for the polishing dust to get ingrained in the wood, so a solution that works well if it can't be masked off, is to use Danish Oil or similar wood finishing product on the wood before polishing, Then when you polish the wood, any polish dust and debris tends to wipe off easily from the treated wood.
The Polishing compound is not inherently food safe but it does not form a permanent part of the surface so as long as you give the finished product a clean before use, then no traces of the compound should remain.
We can ship to the USA no problem, just add the items to the basket and the Shipping calculator will offer available shipping options.