
CUSTOMER GALLERY
Faux Stained Glass Window
Martin has experimented with epoxy on a couple of 'river' tables. When the idea of a bit of stained glass for the hallway came up, he thought he'd have a go at an epoxy window.
Martin wanted to add the finishing touches to his hallway and came up with the idea of creating his own 'faux' stained glass window.
After an unsuccessful search looking for examples of ways of making faux stained glass out of resin he decided to make up his own!
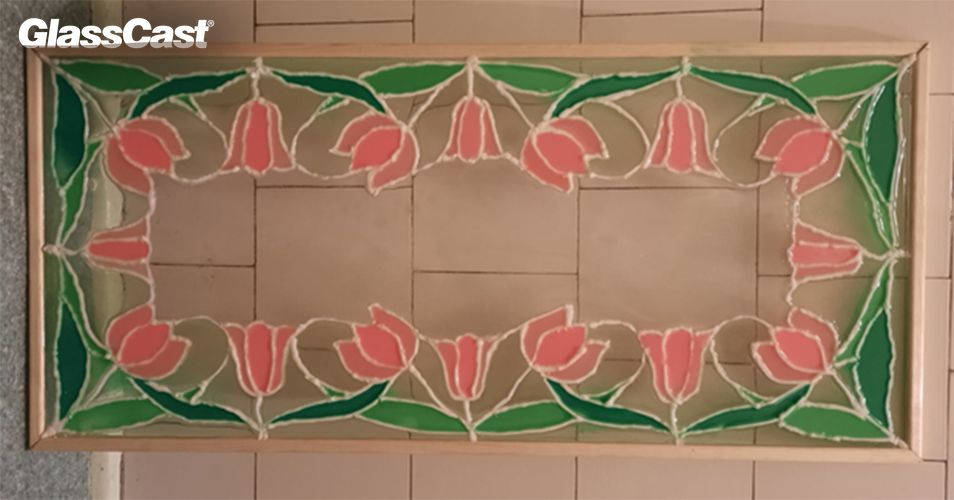
The first step was to draw the boundaries of the glazing onto a lightly sanded Perspex sheet, using pipeable cake icing. These lines would have been a bit cleaner if they’d been drawn by an experienced cake decorator with a steadier hand, but it was a solid first attempt.
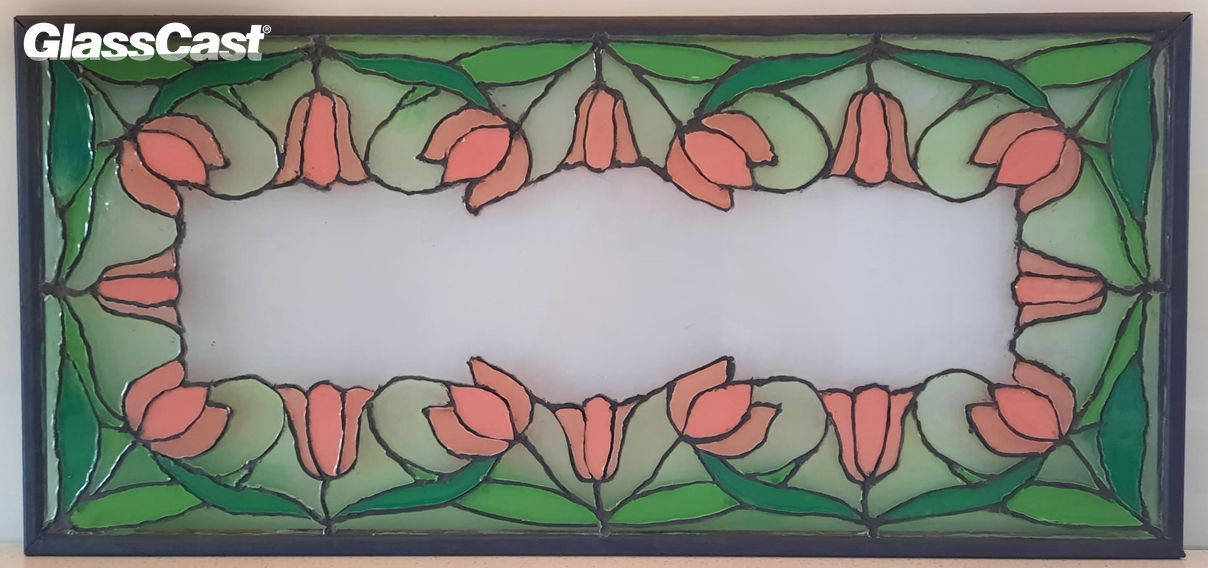
The icing was left to dry then the resin was mixed up and pigmented to the desired different colours, before being poured to a couple of millimetres thick and left to fully cure.
Step three was to dissolve out all of the icing in the bath, with the help of an old toothbrush. The resulting grooves between the ‘stained panes’ were then filled with black tile grout.
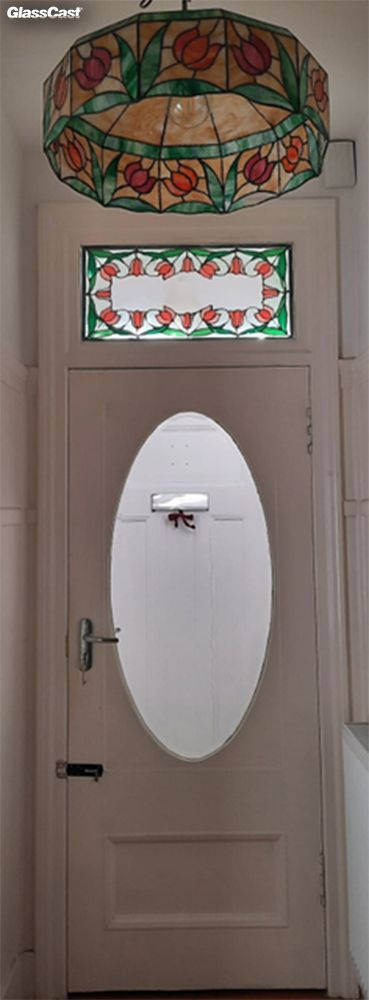
The last photo shows the window mounted in place over the door, next to the hundred year old lampshade it was designed to complement."
Thank you for sharing the project with us Martin, it's a fantastic example of finding a way to replicate a method in an effective way, and problem solving matching an antique no longer available.
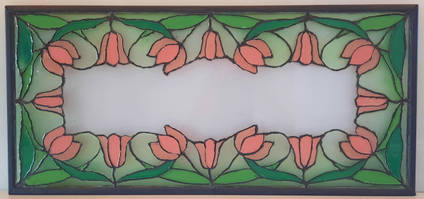
Martin says that the end result does look a bit wobbly, and there’s a bit of leaking between sections of resin. But it was a first attempt and hopefully demonstrates a useful method - we agree!
ABOUT MARTIN
Martin lives in Edinburgh, but spends much of his time, in retirement, sailing around Scandinavia and writing about it!
DISCUSSION (0)
Please share any questions or comments you may have about this video tutorial.
LEAVE A COMMENT OR QUESTION
SIMILAR PROJECTS IN THE GALLERY
USED IN THIS PROJECT
Want to buy the same materials and equipment used in this tutorial? We've got you!
Please find below a list of all the materials and equipment used in this project, all available to buy right here on the GlassCast website. Shown alongside each product is the approximate quantity used in the tutorial video, to the nearest full pack.
RESIN & PIGMENTS
ABOUT MARTIN
Martin lives in Edinburgh, but spends much of his time, in retirement, sailing around Scandinavia and writing about it!
DISCUSSION (0)
Please share any questions or comments you may have about this video tutorial.